
Sometimes you just don’t get the opportunity to get all the planes you need for a feature shot in the air at the same time, and same airspace, be it due to weather, lack of formation rated pilots, where an aircraft has unexpected down time for safety, and so you may end up with shots from the ground, or air to air with them separately.
You don’t have to keep those separate shoots apart if you keep elements of perspective, lighting and for this industry, sensible mindfulness of what to expect from aircraft in formation. This can be as simple as ensuring you don’t Photoshop aircraft so close that their props would be damaging the other aircraft in formation, to ensuring you don’t pretend an F-18F SuperHornet can fly slow enough to formate with a Tiger Moth.
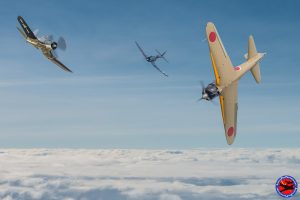
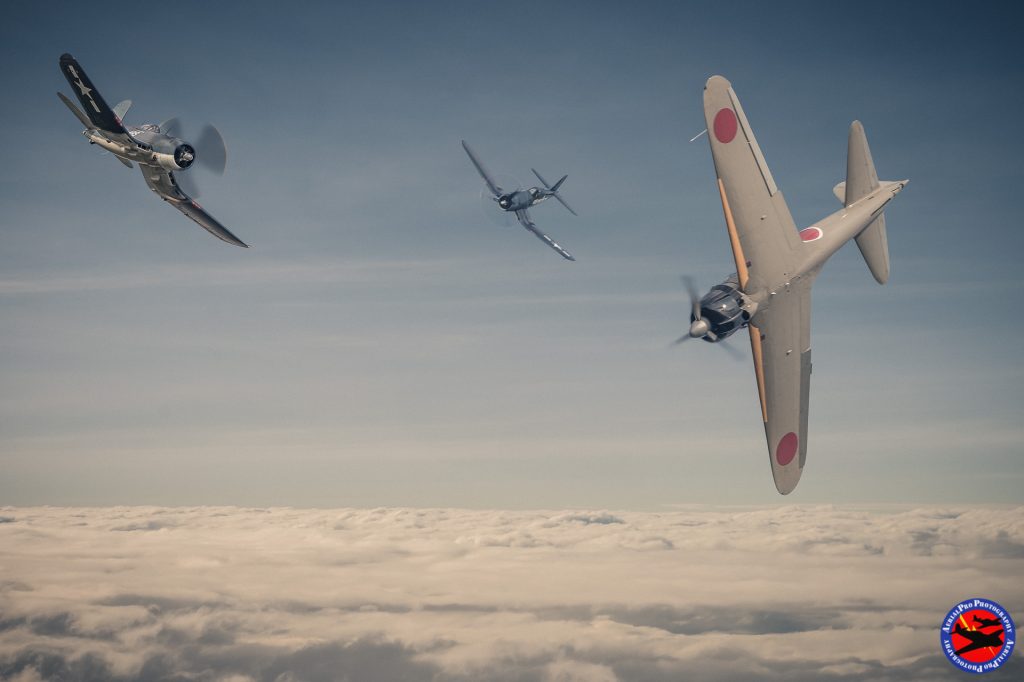
Before I begin, I’ll explain the background of the image I’m compositing. We’ll use some of our archive images to illustrate a Mitsubishi Zero trying to escape from use of a WWII tactic still taught in dogfighting schools today.
While the Thach Weave (also known as a Beam Defense Position) is an aerial combat tactic developed by naval aviator John S. Thach of the United States Navy, first used in 1942 as a defensive tactic for the under-powered Grumman Wildcats, it proved so effective that it was soon taught to fighter pilots of the rest of the US Navy, and to the USAAF. The below graphic explains the basic version of the weave, where the faster aggressor aircraft (in red) tries to fire on the Wildcat on the left and follows it through to the right side of the weave and then right into the line of fire of the second Wildcat doing the reverse side of the weave, which forces it to dive and allows the allied fighters to chase it (which is where out image concept appears).

Source images for the below composite were all shot on a Nikon D4S with the superb Nikkor 600mm f/4 lens at the 2014 EAA Oshkosh with just the Texas Flying Legends Museum Mitsubishi Zero and FG-1D Corsair (duplicated)

Layers used here, top to bottom.
Layer three is only the spin of the Corsair prop. Images were shot at higher speed than my usual air to air due to the focal length (600mm) leading to the dreaded ‘mid-air emergency prop’ appearance.
It’s basically just created via making an oval path to match the yellow prop tips, making a new layer, adding an inside stroke of the pixel count to match the size of the prop tip stripe, then fill the rest with black. Select what you have on that layer, then make a mask of it. Then feather three matching deselections of that in the mask and brush it out.
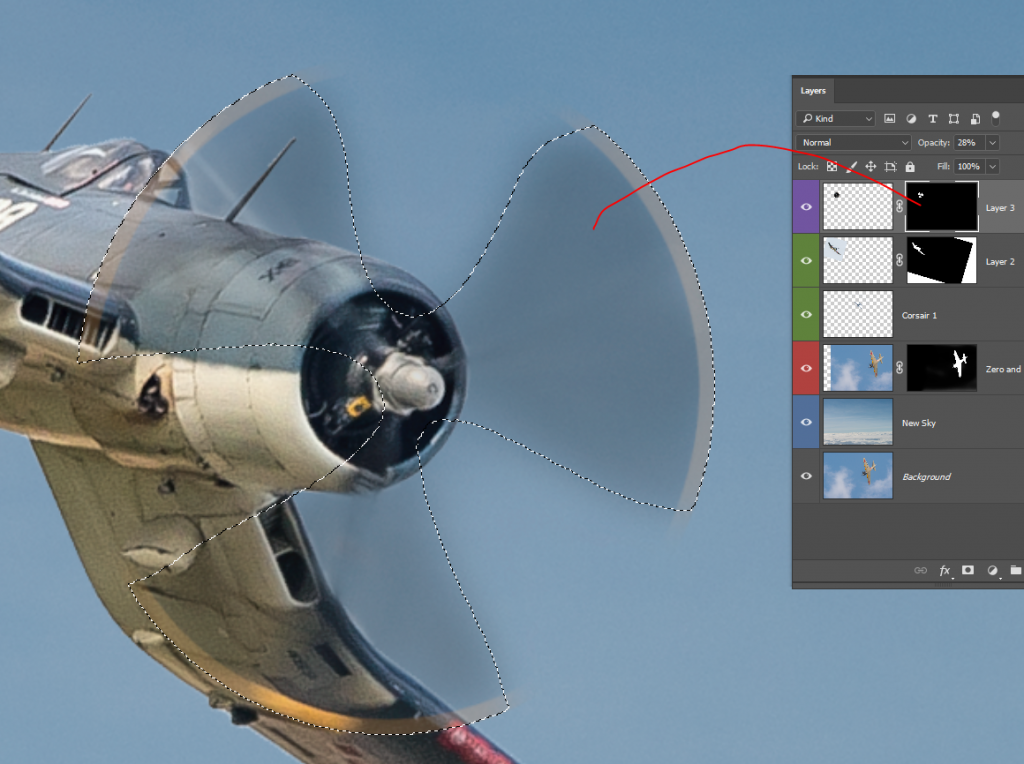
Layer two is the Corsair on the left and it’s masked so that the props can be brushed out non-destructively.
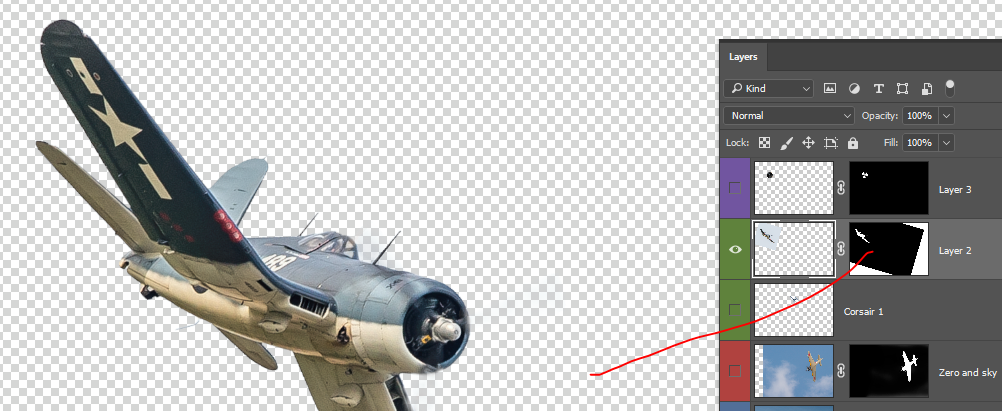
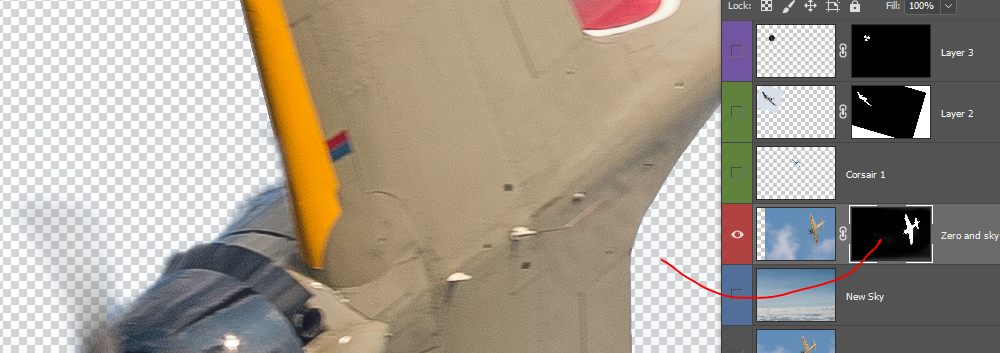
If you’ve been deep-etching via using eraser you’ve possibly already encountered the hassle of losing pixels from part of an image and noticing well after the maximum number of [undo] can be backed up. Use the masking tool instead, because you can always brush in or brush out details later if you decide you’ve got to retail a detail rather than cut it out. The screenshot below shows how you can create a mask. I selected the pixels around the aircraft with magic wand tool and then clicked the mask button in the layers palette. Details can then be refined with airbrush by painting in greyscale within the mask itself. You aren’t then restricted to just black or white, but rather a gradient between the two allowing for fades of layer details.
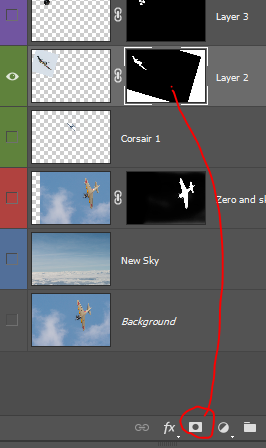
The distant Corsair layer has been added and deep-etched via the very basic erasing of pixels around the aircraft. Selecting sky around the aircraft also selected parts of the aircraft as well and shows why I prefer to work with masking instead.
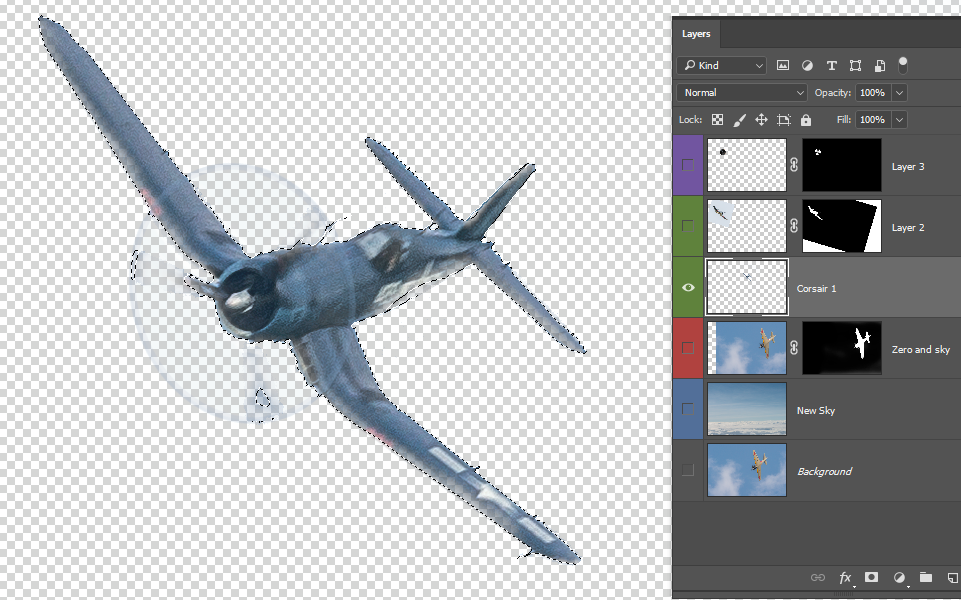
The Zero and Sky layer was the original background however simple masking out of the sky of this allowed the New Sky layer to show through from behind.
I picked a cloud top image photographed from about 30,000ft over the Pacific with a Nikon D800, 24-70mm lens, which is the only image here not at 600mm focal length however it scales to work well as the background.
Grading for these was quite basic given the three aircraft were shot from the same vantage point, in the same direction with the same light within the space of about five minutes. The background Corsair had to be lightened, and the new sky straightened.
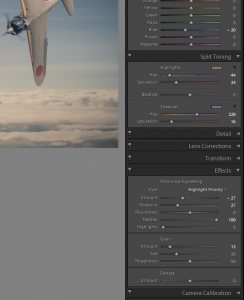
If you want to push it one more step that aids in putting the whole feel of the shot being ‘as shot’, create a virtual copy of the PSD of your composite in Adobe Lightroom, and then work with global adjustments to give some more atmosphere to the image. Here I’ve reduced the Vibrance and softened the highlights, lifted shadows and desaturated the yellows and oranges, before adding Split Toning to the finished shot. Split Toning lets you warm or cool (tint) the highlights and shadows separately, so I’ve warmed the highlights to give more afternoon glow, and cooled the shadows. A Gradient filter is used to warm the cloud layer further and to push the colour depth.
Finally, adding a little bit of grain and a Post-Crop Vignette just applies a little bit of vintage lens appearance and the image is then complete.
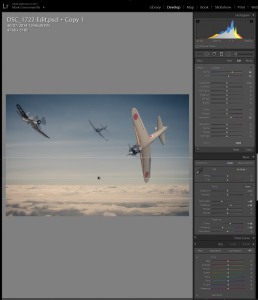
Here’s the final image with the extra grading completed. Click through the image for the HD version.
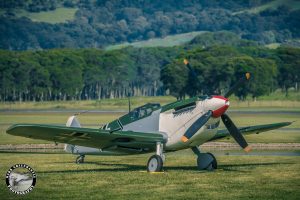
For static works you often find far more complexity in trying to match hues and tones of background subjects to the foreground. Deep etching this Buchon wasn’t the part of this piece that took the longest, rather getting the blend of foreground to background grass to match and for the perspective of elements to match. The aircraft was shot in Oshkosh Wisconsin in front of a crowded carpark with shops behind the cars. It had a new background dropped in from the HARS Museum and airport in Illawarra, New South Wales.
Recent Comments